
The floor you draw here is the same floor your team runs service on. Ten minutes of dragging things around, and the app knows your room. Staff don't see the Floor plan button — it's for managers and owners.
Open Floor plan, then tap Edit
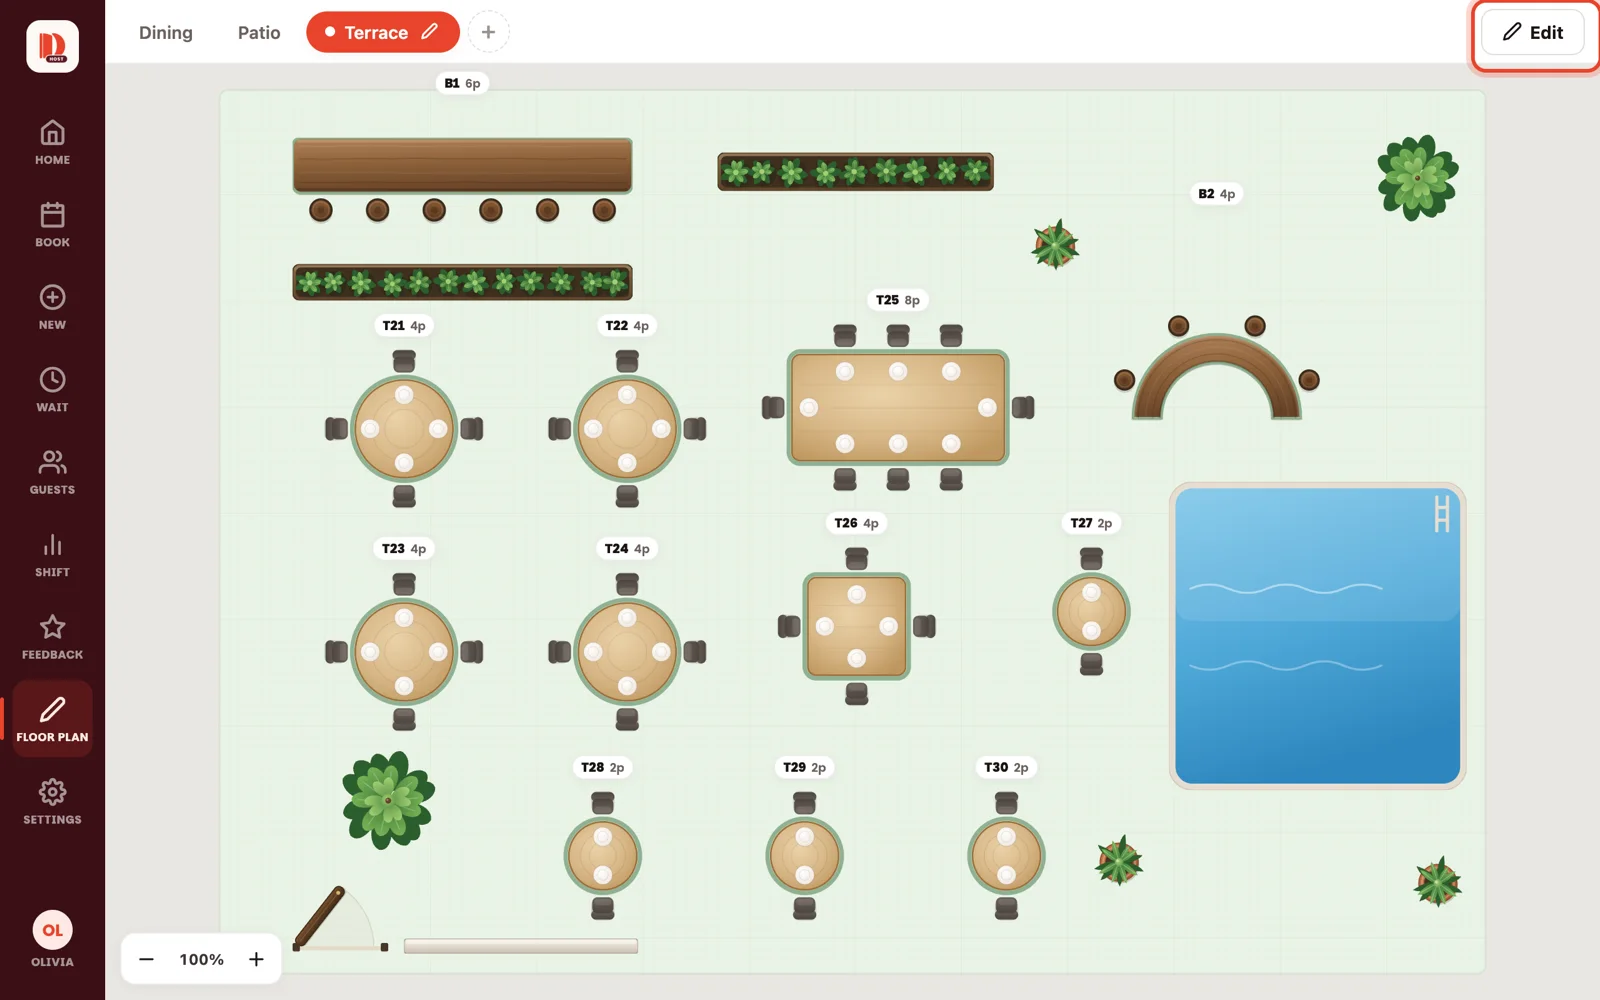
Floor plan in the menu shows your room as it is (on a phone: More, then Floor plan). Tap Edit at the top right to start changing it.
Tap what you want to add
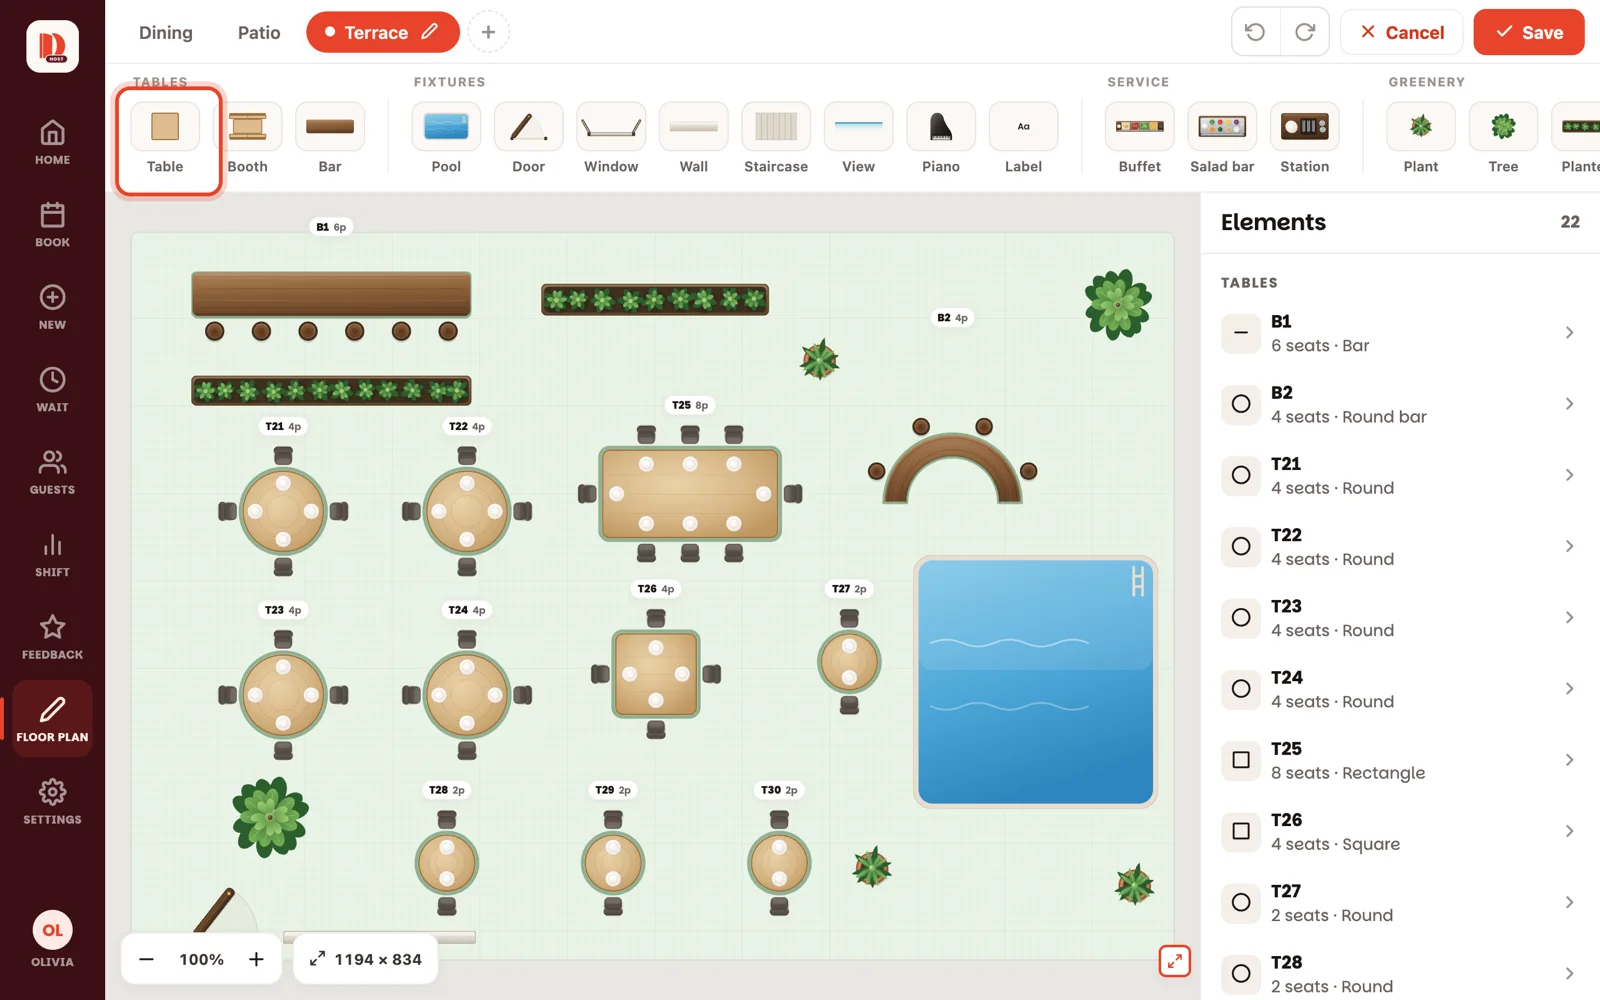
A row of things to add appears at the top. One tap puts it on the floor:
- Tables — Table, Booth, Bar.
- Fixtures — Pool, Door, Window, Wall, Staircase, View, Piano, Label (for signs like "WC").
- Service — Buffet, Salad bar, Station.
- Greenery — Plant, Tree, Planter.
New tables name themselves (T1, T2…) and land next to the table you last picked, so tapping Table a few times builds a row. On a phone, the round + button opens the same list.
Set it up in the details panel
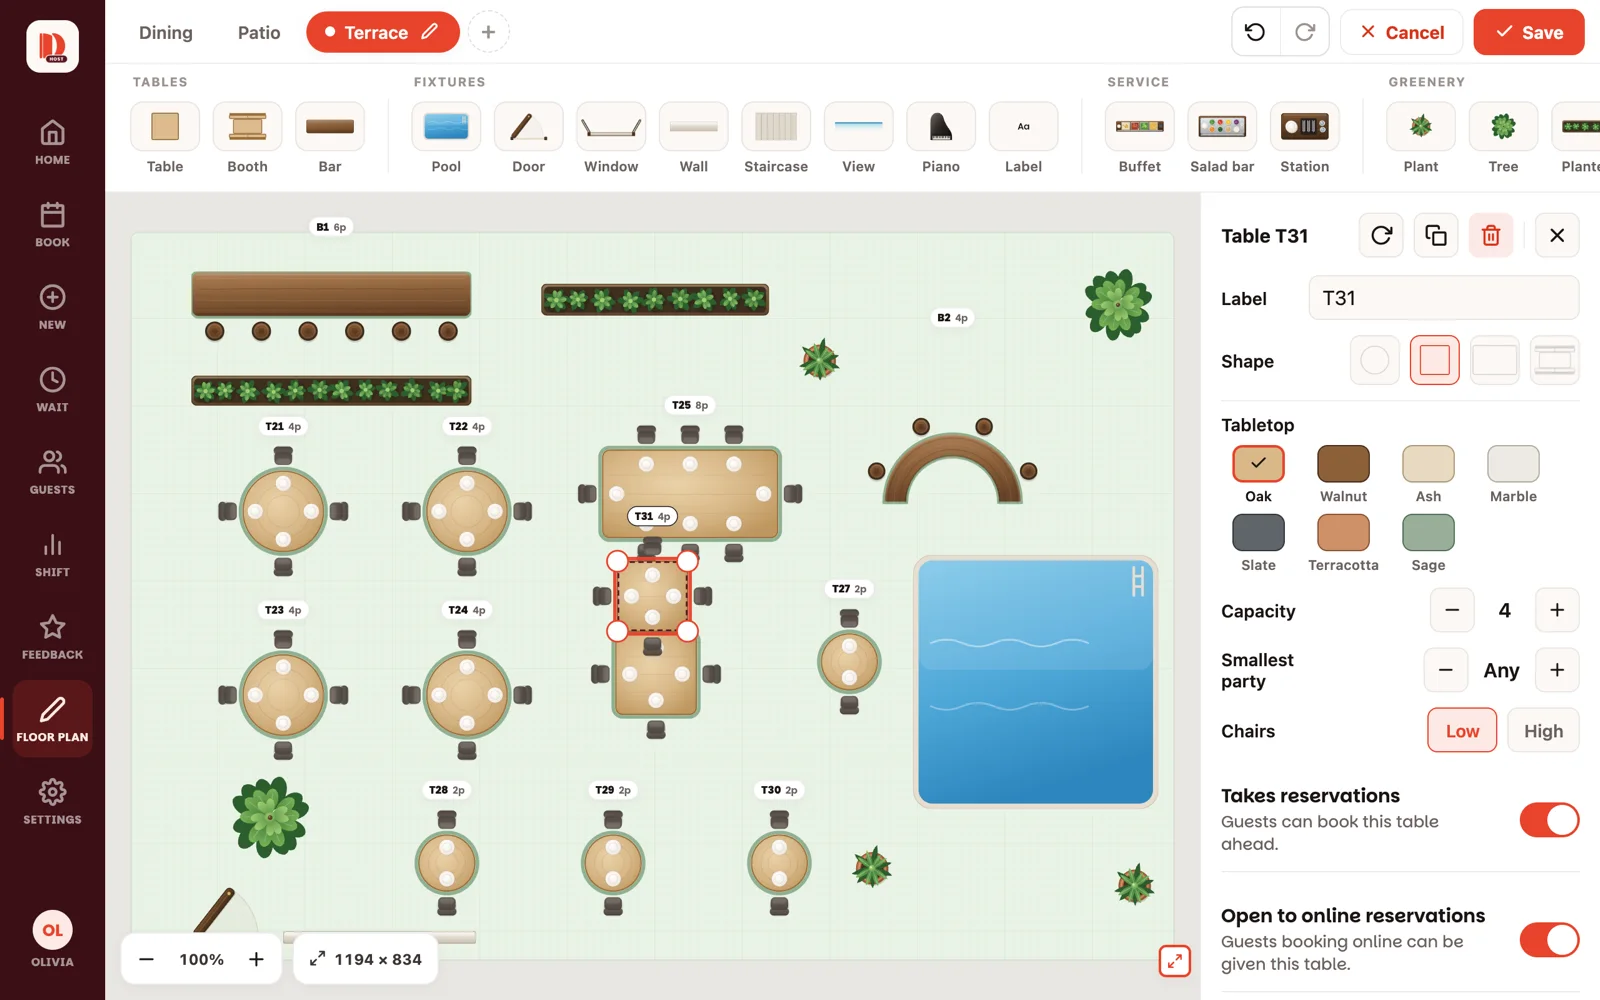
Anything you add opens its details straight away. For a table:
- Label — its name on the floor. Match your room ("12", "P4"…). No two tables can share one.
- Shape — round, square, rectangle or booth. Tabletop — the wood or stone it's drawn in.
- Capacity — how many it seats. The chairs draw themselves.
- Smallest party — keep a big table for big groups: a six-top set to 4 won't be offered to a couple.
- Chairs — low, or high for a high table.
- Takes reservations — switch off for a table you never book ahead (the staff table, the chef's counter). You can still seat walk-ins there.
- Open to online reservations — switch off to keep a table for phone reservations and walk-ins only.
- Push together with other tables — leave on for tables you can shove against a neighbour, so a big party can still be booked when two free tables are side by side. Two tables that seat fewer together than apart (you lose the joined ends)? Open Seats when pushed together and set what the pair really seats.
The buttons at the top of the panel turn it 45°, make a copy, or delete it.
Drag everything into place
Drag to move — lines appear when things line up, and they settle neatly when you let go. Push a table into another and it stops flush against it, squared up, with no chairs left between the two — the way you'd push them together in the room. Pull the round corner handles to resize. Pinch, or use the zoom buttons at the bottom left, to work comfortably — two fingers always zoom, even when one of them starts on a table.
A door opens one way. Hung on the other side? Tap it and pick the other door under Opens.
Split the room into areas

The tabs at the top — Dining, Patio, Terrace — are separate rooms, each with its own map. + adds one. Tap the pencil on a tab to rename it, change its size, or delete it. The Room colour swatches at the end of the row tint the floor — Indoor, Outdoor, Patio, Garden, Poolside, Terrace, Lounge, Stone.
Tap Save when it looks right
Save finishes. Your team sees the new floor straight away.
The editor saves as you work — Save just closes it. Trying things out? Cancel puts everything back the way it was when you tapped Edit. The undo arrow steps back one change at a time.
Good to know
- Every room starts about the size of a tablet screen. Room bigger than that? Tap Resize room next to the zoom, then drag any wall — or a corner — out. Pull the left or top wall and the furniture comes with it, so nothing moves on the plan. A wall stops at the furniture nearest it. Exact size types the numbers in instead; Done finishes.
- Deleting an area deletes everything in it — the app asks first — and you always keep at least one area.
- A red bar saying something wasn't saved names the table and the reason — a table outside the room, say. Fix it and it saves.
- A quiet afternoon is the best time for floor surgery: the live floor follows your edits.